
Why Raise Worms?
Raising worms is an easy and eco-friendly way to reduce kitchen waste while producing high-quality compost. Instead of tossing food scraps into the trash or down the garbage disposal, feed them to your worms! Vermicomposting helps minimize landfill contributions and protects our water systems from organic waste contamination.
Worms produce nutrient-rich castings that make an exceptional natural fertilizer. This compost improves soil structure, boosts microbial activity, and supplies plants with readily available nutrients. If you’re a gardener, this means healthier plants and reduced need for synthetic fertilizers.
And if you fish? Raising your own worms is a budget-friendly way to keep bait on hand.
Regardless of your reason, worm farming is simple, rewarding, and an excellent way to contribute to a greener planet.
Best Worms for Composting
Three types of composting worms are commonly used:
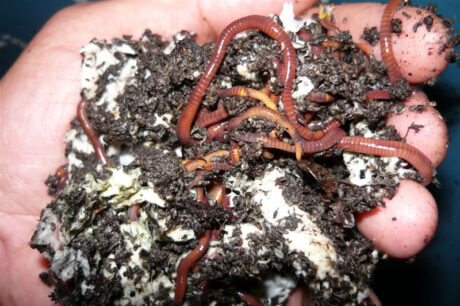
Red Wigglers (Eisenia fetida)
Excellent for beginners
Thrive in confined bins
Tolerant of disturbances
Rapid composters of food scraps and paper
European Nightcrawlers (Eisenia hortensis)
Slightly larger than Red Wigglers
Tolerate a range of conditions
Less tolerant of frequent bedding disturbance
African Nightcrawlers (Eudrilus eugeniae)
Fast composters and heavy casting producers
Best for warm climates
Sensitive to cold and low pH levels
Where to Raise Composting Worms
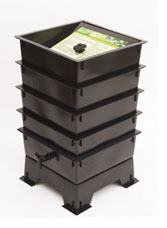
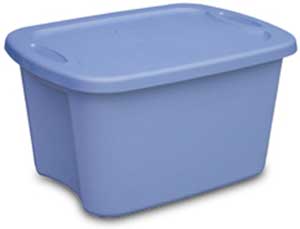 Worm Bins Ideal for indoor composting, worm bins provide a climate-controlled environment. DIY plastic bins or systems like the Worm Factory work well. Use opaque containers to reduce light exposure, and place the bin in a basement, garage (only if it stays cool), closet, or shaded porch.
Tip: Avoid leaving bins in direct sunlight or hot garages—temperatures above 100°F can be fatal to worms.
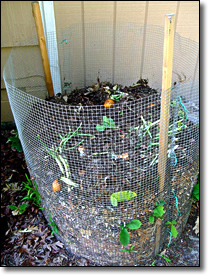 Compost Piles Great for gardeners! Compost piles with worms break down organic material faster than traditional piles. Choose a shady spot, build a simple enclosure, add mulch and food scraps, water thoroughly, and add worms after a week.
Tip: Use a pitchfork instead of a shovel when turning your pile to minimize worm injury
Choosing the Right Bin Size
Start with an 18-gallon opaque bin if you’re doing it yourself. This size works well for 2–3 pounds of worms, which can grow to a population of about 5 pounds. Commercial systems like the Worm Factory can be expanded with trays based on your composting volume.
Best Bedding for Worm Bins
 Shredded Paper
Easy to find and clean
Must be moistened before use
Avoid glossy/coated paper
Pros: Inexpensive, safe, and odorless
Cons: Can clump if not shredded finely
 Coconut Coir
Sustainable and absorbent
Excellent airflow and moisture retention
Pros: Renewable, mixes well, clean
Cons: No nutritional value for worms
 Manure
Best used outdoors or to supplement indoor bedding
Use aged rabbit, cow, or horse manure (avoid fresh manure unless composted)
Pros: Nutrient-rich and promotes growth
Cons: May contain de-worming chemicals; must be composted
 Peat or Sphagnum Moss
Common in gardening supplies
Retains moisture well
Pros: Readily available
Cons: Environmentally unsustainable, potentially acidic
Tip: To balance pH, soak peat or add garden lime (not hydrated lime) before use. Crushed eggshells also raise pH.
Maintenance Tip: Fluff bedding weekly to improve airflow and aid decomposition.
Feeding Your Worms
What to Feed: Worms eat decomposing organic matter, especially bacteria and fungi on food waste. Common food includes:
Fruit and vegetable scraps
Coffee grounds and tea bags
Crushed eggshells
Bread (sparingly)
Do NOT Feed:
Meat, dairy, bones
Salty or oily foods
Pet waste
Excess citrus
Alcohol
Grass clippings in large amounts
Treated wood or sawdust
How to Feed: Bury scraps in one corner of the bin, halfway down. Check weekly and rotate to the next corner. Chop or lightly cook fibrous vegetables to speed decomposition.
How Much to Feed: A fist-sized portion per pound of worms is a good start. Check leftovers weekly to adjust. Overfeeding can lead to heat buildup and foul smells. If the bin smells, reduce feeding and increase aeration.
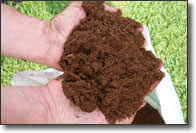
Harvesting Worm Castings
After 1–2 months, the bedding will be replaced by dark, crumbly castings. When most bedding is gone, it’s time to harvest.
 How to Harvest:
Move contents into piles under bright light—worms will burrow down.
Scoop off top layer of finished compost.
Transfer worms to fresh bedding.
Use finished vermicompost in gardens, pots, or mix into soil to enhance plant health and growth.
Conclusion
Raising composting worms is a simple, sustainable, and rewarding activity that benefits your garden and the environment. Whether you’re interested in improving soil health, reducing food waste, or growing your own fishing bait, vermiculture is a fantastic way to go green. Start small, stay consistent, and enjoy the transformation from scraps to soil!