When setting up a worm habitat, your first major decision is choosing the location: indoors or outdoors. Both options have unique advantages and challenges, so it’s essential to consider your climate, available space, and long-term worm farming goals.
Indoor vs. Outdoor Worm Habitats
Indoor Worm Habitats
Keeping your worm bin indoors — in a basement, garage, utility room, or spare bedroom — offers excellent environmental control. Temperatures inside your home typically stay within the ideal range for worms (65°F–85°F), ensuring year-round productivity. An indoor habitat is especially beneficial if you live in a region with cold winters. Additionally, indoor worm bins require less maintenance when it comes to moisture control, and you’ll avoid many of the pests and predators that are common outdoors.
Outdoor Worm Habitats
Raising worms outdoors may seem more natural, and it gives you flexibility to scale up your operation. Outdoor bins or beds are easier to expand and allow for simpler cleanup when it’s time to harvest castings. However, outdoor environments are exposed to temperature fluctuations, direct sunlight, wind, and predators. If your area experiences freezing temperatures, you risk losing your worm population unless you’re using cold-hardy species or deep, insulated beds.
Understanding Worms and Cold Weather
 Worms are cold-blooded, meaning they can’t regulate their body heat. As temperatures drop, their metabolism slows, and they become less active. Prolonged exposure to cold can result in hypothermia and death, particularly for tropical species like African Nightcrawlers, which die below 50°F.
You might wonder why wild worms survive winter. The answer lies in their reproductive strategy: worms produce resilient egg capsules throughout the warm months. These capsules can survive freezing conditions and hatch once spring arrives. While adult worms may die during winter, their offspring ensure population recovery.
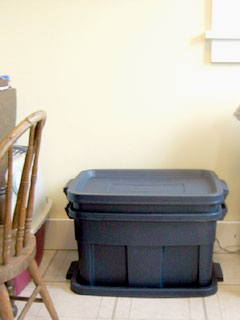
Raising Worms Indoors: What to Know
 Pros:
Pros:
-
Optimal temperature and humidity control
-
Year-round worm activity and reproduction
-
Minimal moisture loss from evaporation
-
Reduced exposure to outdoor pests and predators
Things to Keep in Mind:
-
You’ll need to regularly add or replace bedding.
-
Some gnats or mites may appear, but these are manageable.
-
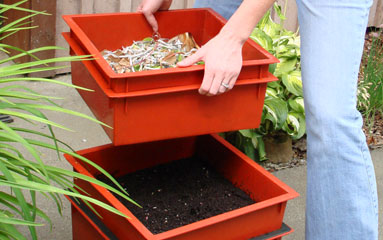
Harvesting and separating worms from castings may require extra setup space.
-
A hot garage or shed can be risky in summer unless it’s climate-controlled.
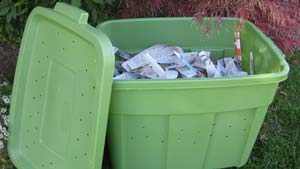
Raising Worms Outdoors: What to Know
 Pros:
Pros:
-
Easier to scale up worm production
-
Mess stays outside — ideal for larger harvesting operations
-
No worries about indoor odor or accidental spills
Challenges:
-
Exposure to environmental stressors like sunlight, rain, and wind
-
Temperature extremes can slow reproduction or kill worms
-
Requires careful placement in a shady, protected location (e.g., under a tree or on the north side of a building)
-
Potential predators include moles, centipedes, fire ants, and hammerhead worms
Choosing the Right Location for Your Worm Bin
To maintain a thriving worm population and maximize compost production, consider:
-
Temperature stability – Aim for 65°F–85°F
-
Moisture control – Avoid drying out or waterlogging
-
Predator protection – Keep bins off the ground and covered
-
Convenience – Choose a location where you can easily monitor and maintain the bin
Final Thoughts
Whether you raise worms indoors or outdoors, success depends on proper planning. An indoor setup offers better environmental control, while an outdoor habitat gives you room to grow — but requires more vigilance against the elements and predators. By understanding your local climate and the specific needs of your worm species, you can choose the perfect spot for your worm habitat and enjoy a thriving vermiculture system all year long.